Unlocking the Power of Partitioning in Power BI: The Game-Changer for Semantic Models!
by Eugene Mazarakis
Introduction
Power BI offers the capability, when designing a semantic model containing tables, to create partitions within these tables, enabling faster loading of large tables into the model. This is achieved by refreshing only the data of the most recent partitions during each refresh cycle. This functionality is particularly useful, as it significantly reduces the time required to refresh the semantic model in Power BI service, and also allows for the creation of models that include extremely large tables.
Let’s assume that we have the following architecture:
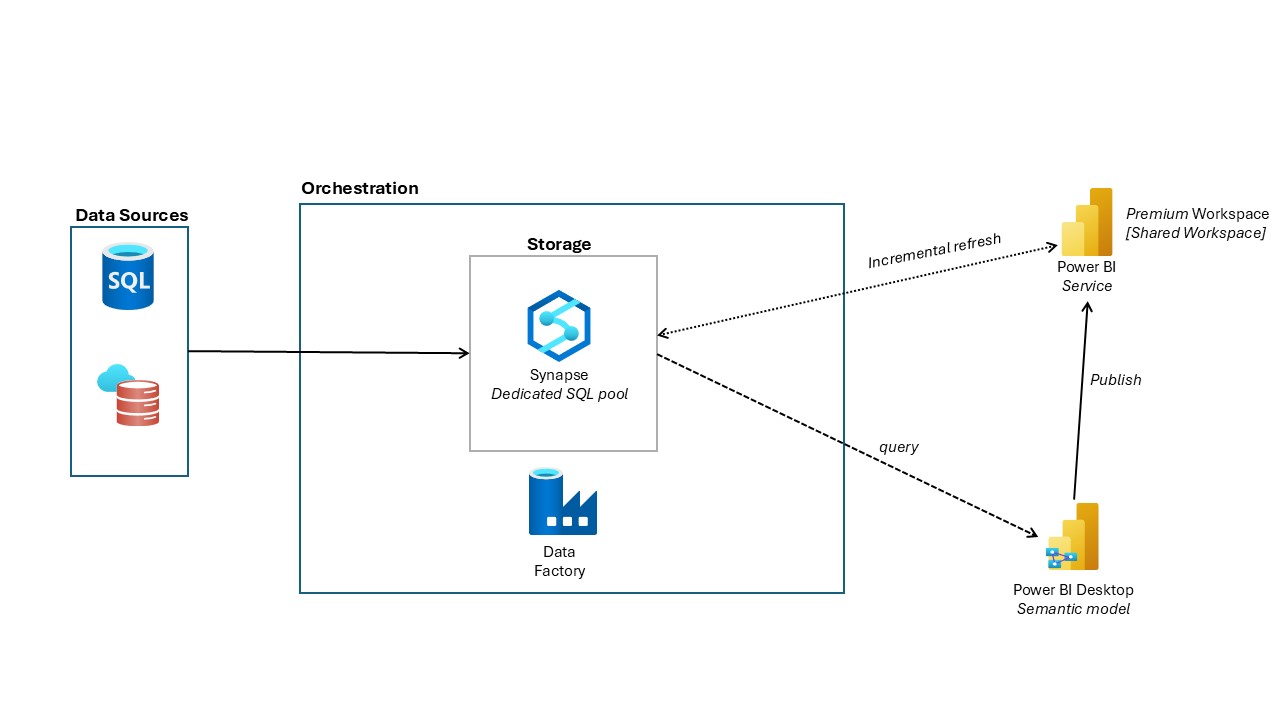
Our data resides in Azure Synapse Analytics, and we will connect to it using Power BI Desktop to create a semantic model. We will then apply an incremental refresh policy, which enables the creation of partitions in the tables. Once the model is ready, we will publish it to Power BI Service within a premium workspace.
NOTE While it is possible to publish the model in a shared workspace, this option comes with certain limitations regarding the management of the model’s partitions. See Section: Shared Capacity Limitations
Semantic model specifications
The semantic model to be created will have the following specifications:
- Import storage mode will be utilized.
- Partitioning works only with this type of mode. See References 5
- Two parameters will be implemented to enable incremental refresh. See References 3,4
- RangeStart & RangeEnd (be careful case sensitive and DateTime data type)
- Incremental refresh policy will be applied. See References 1,2
- Partitions will be created for XXX historical months and YYY refresh period months. For this case, we will work with the month option.
- Alternatively, we can select years, quarters, or days for the historical period and refresh period.
Steps for Model Creation
In order to create and publish the semantic model, we do the following steps:
- Open a new Power BI (.pbix) file.
- Select Get Data > Azure > Azure Synapse Analytics SQL, then click Connect.
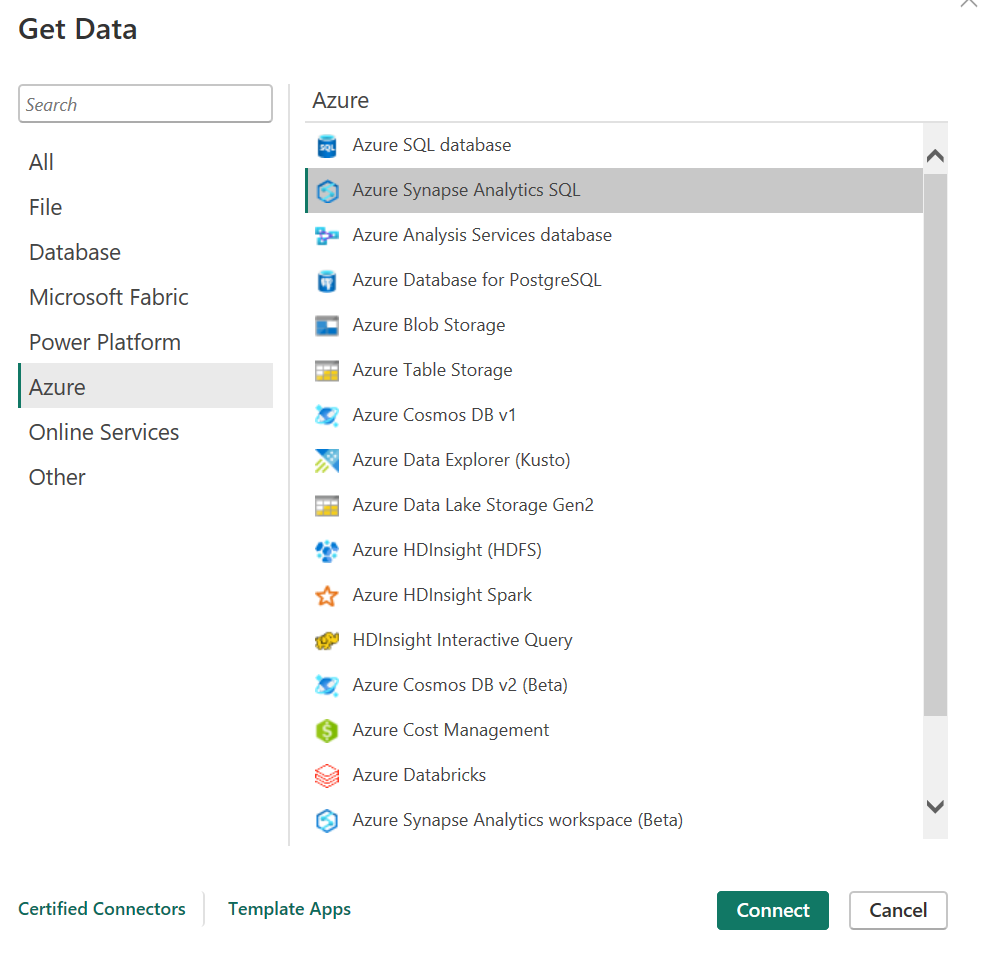
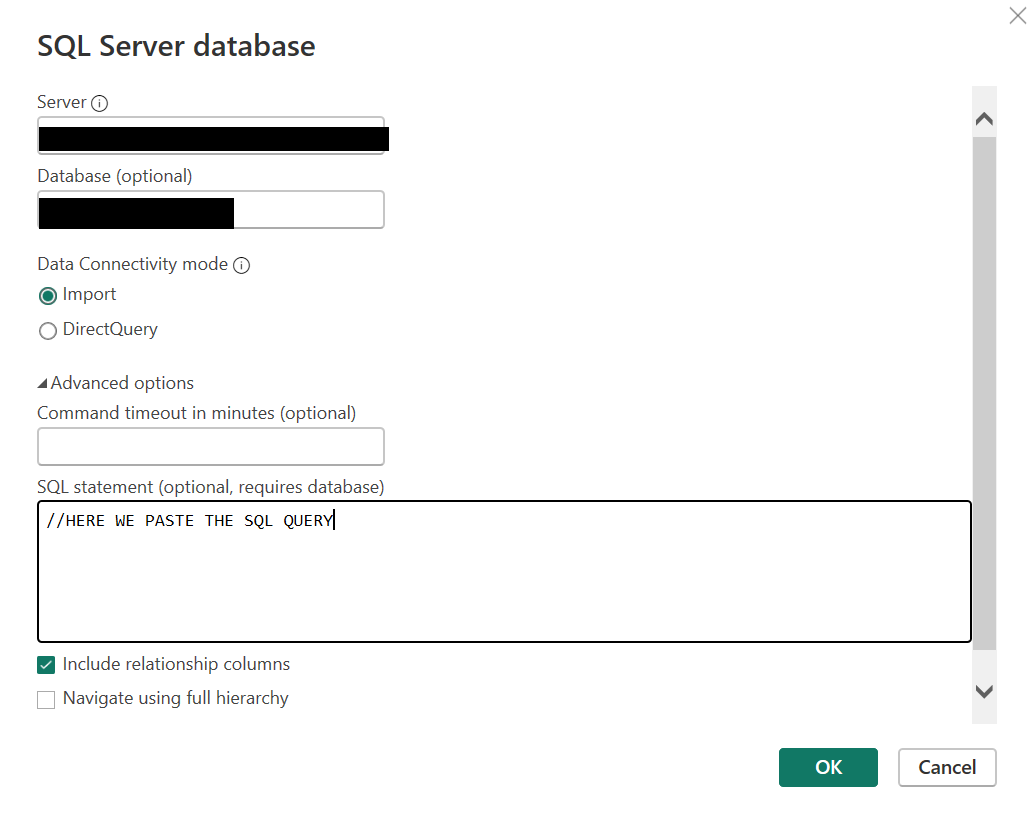
- In the pop-up window, enter the following details:
- Server
- Database
- Import: Enabled
- SQL statement: Include the appropriate SQL query here if you prefer not to load the entire table.
- In the next window, you’ll see data preview. Click Load.
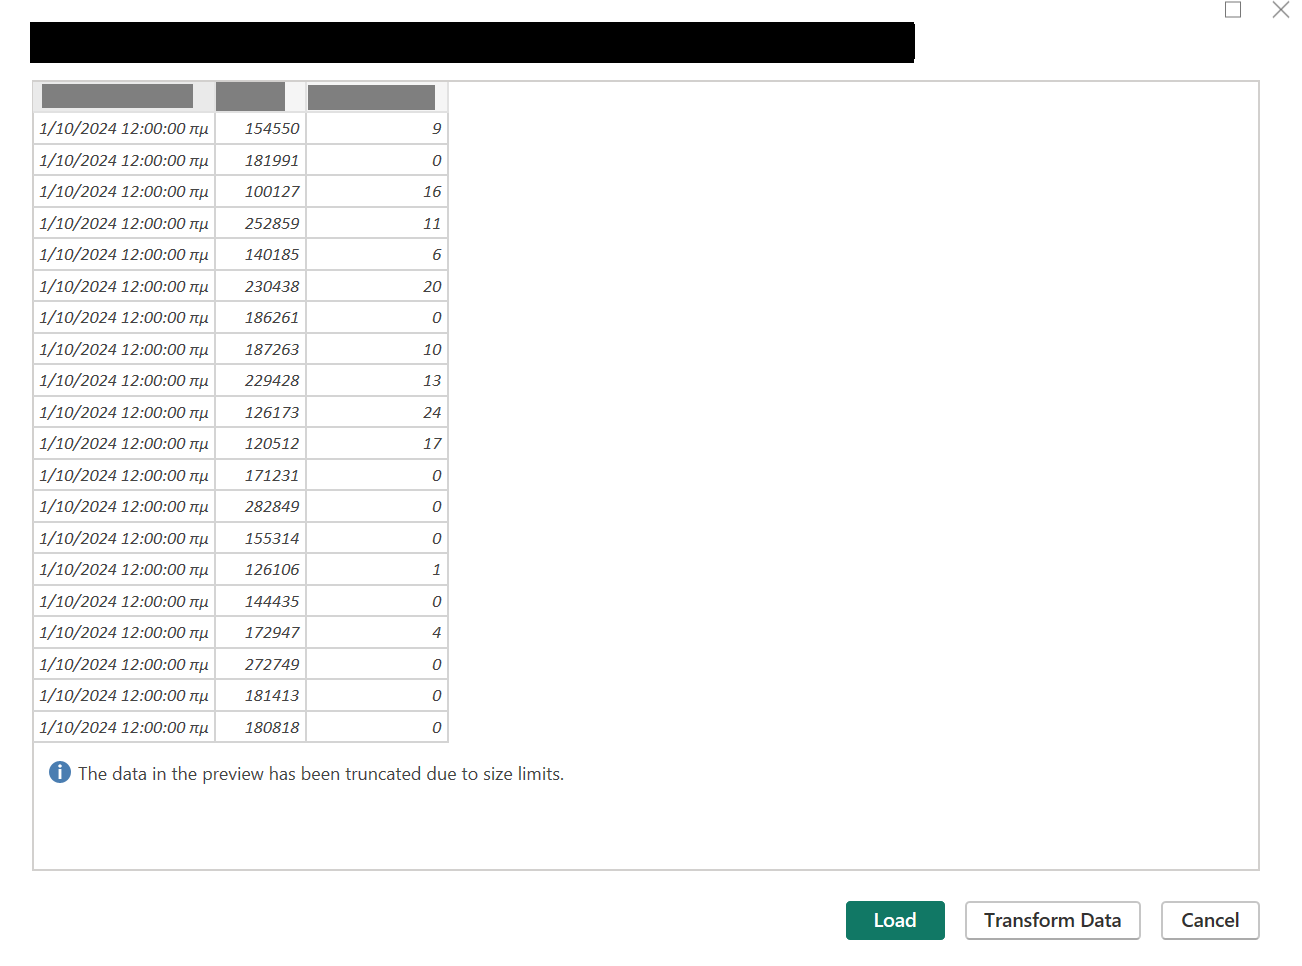
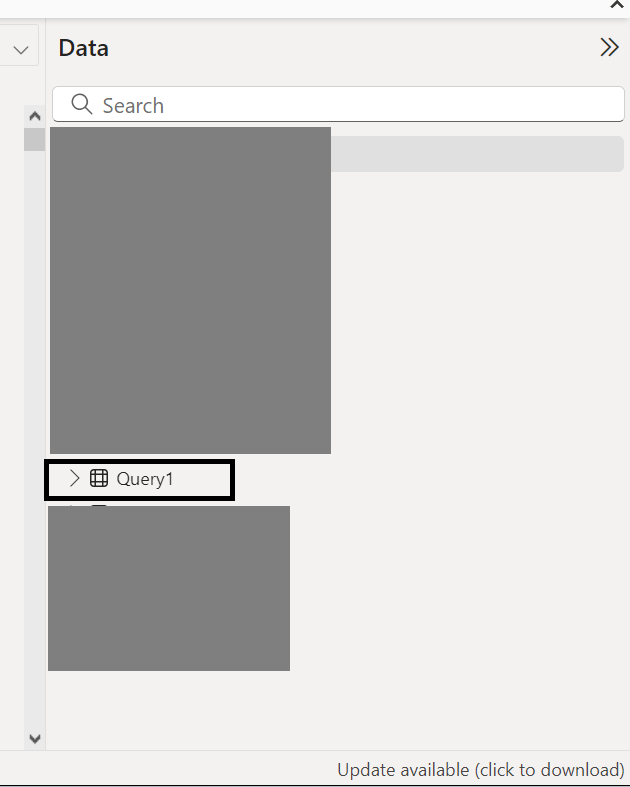
- After loading, a table will be created in Power BI model, typically named something like “Query1”.
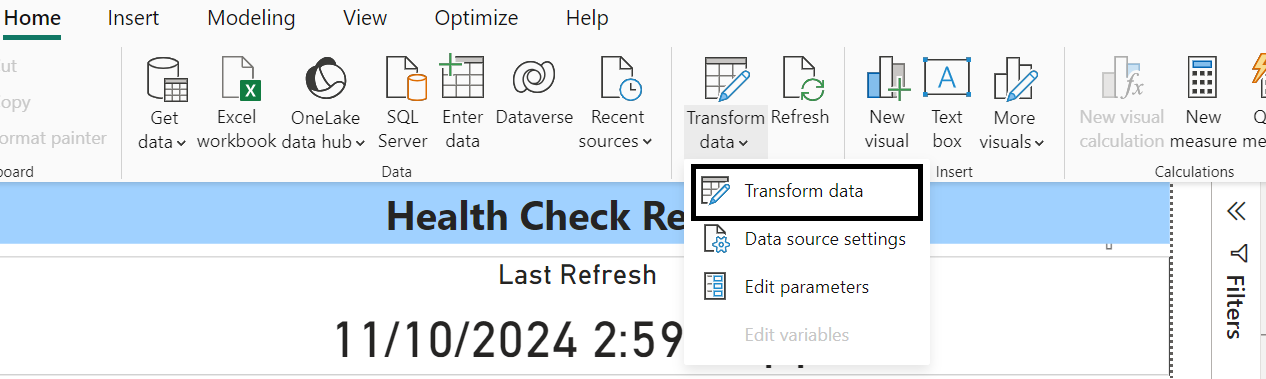
- Open the Power Query Editor to transform your “Query1” (e.g., renaming, adding parameters).
- Go to Home > Transform data > Transform data.
- In the Power Query Editor:
- First, rename the “Query1” table to something more descriptive SALES_DATA (based on the business data).
- Double-click on the table name to rename it.
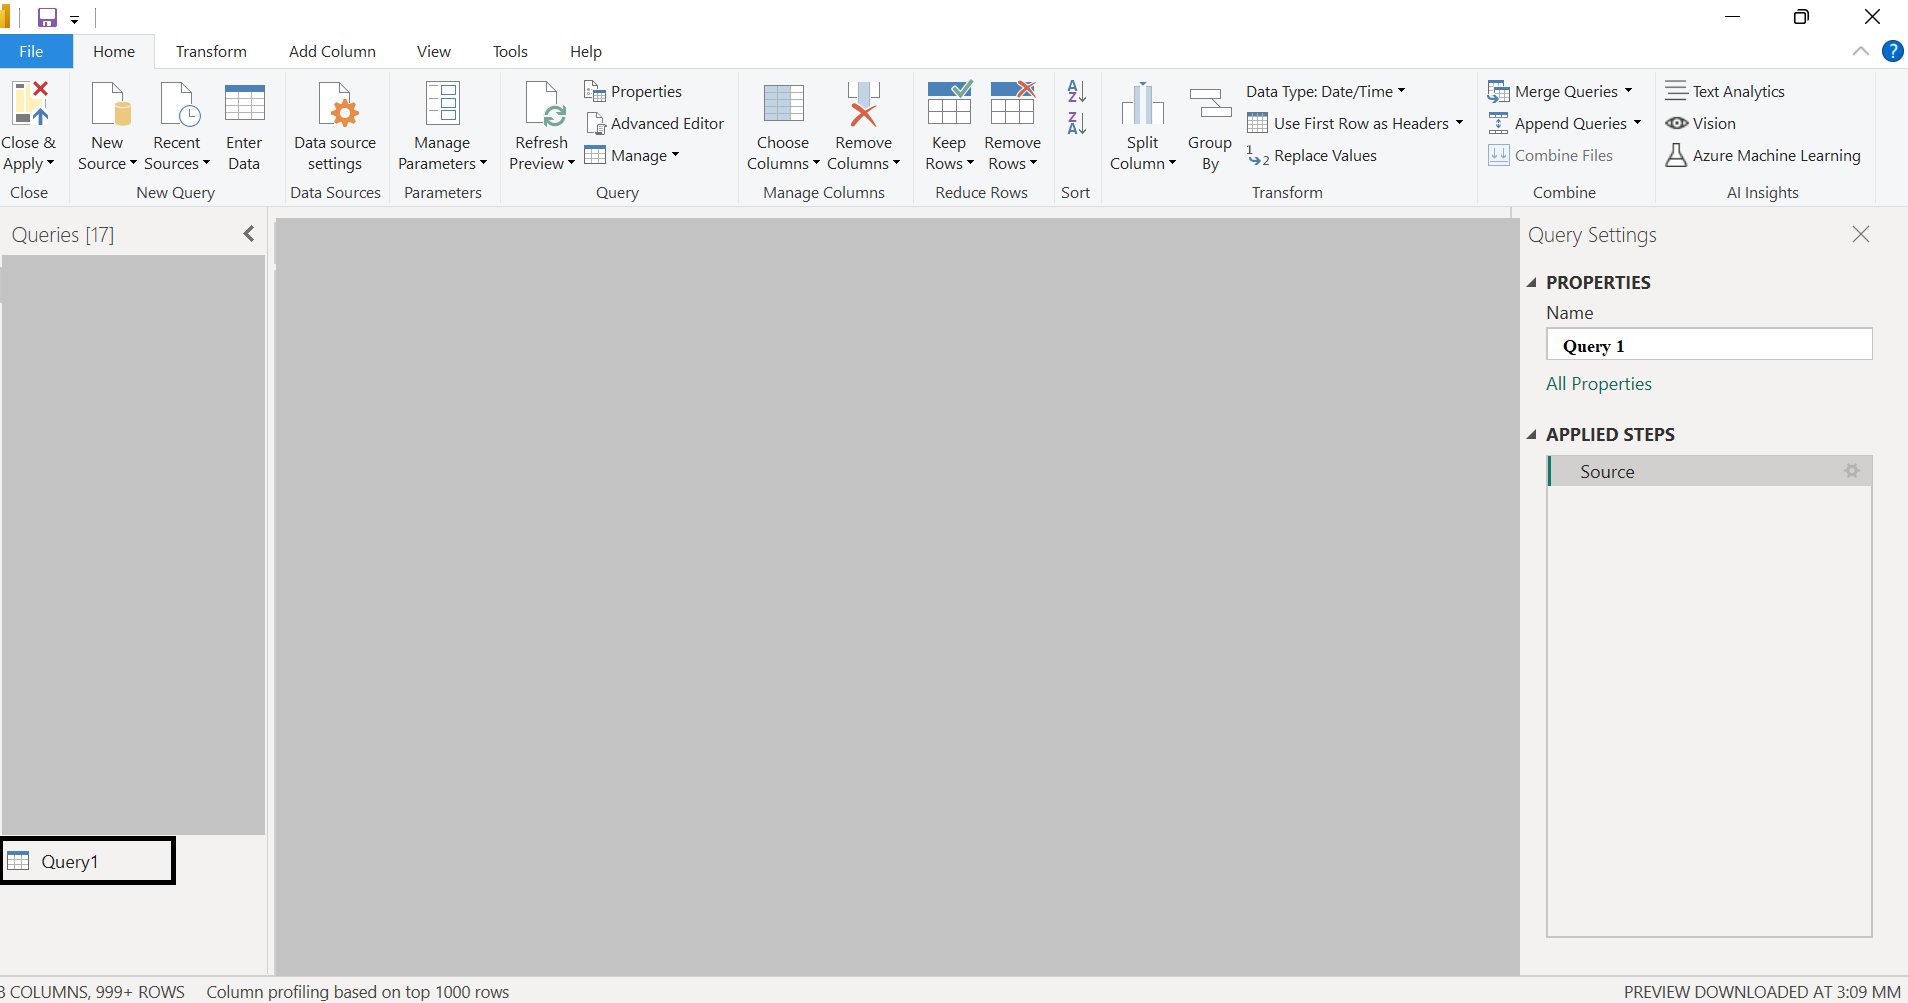
- Select the SALES_DATA table, then check the APPLIED STEPS pane on the right.
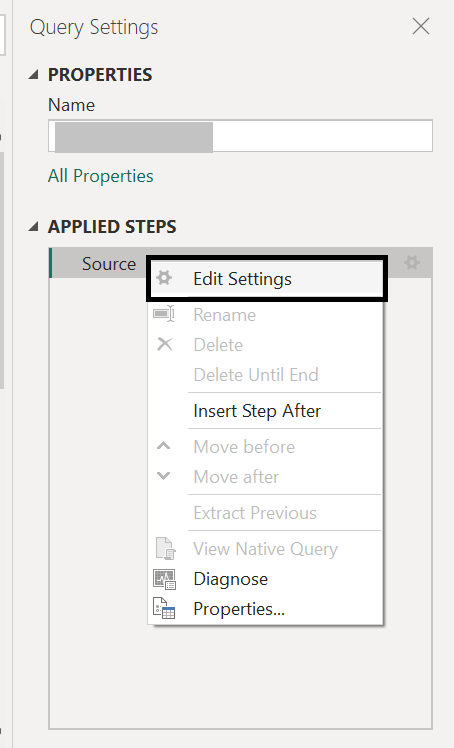
- To edit the SQL query (applicable only if you added a SQL statement in step 3).
- Right-click the Source step and select Edit Settings or click the gear icon.
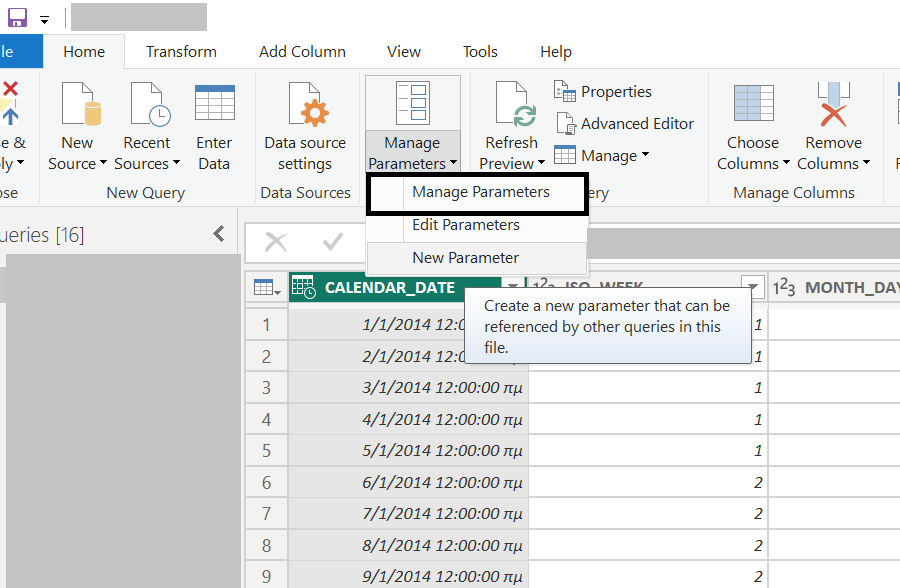
- You can now create the two parameters that will be used to implement the incremental refresh policy.
- You are still inside the Power Query Editor.
- Go to Home > Manage Parameters > New Parameter.
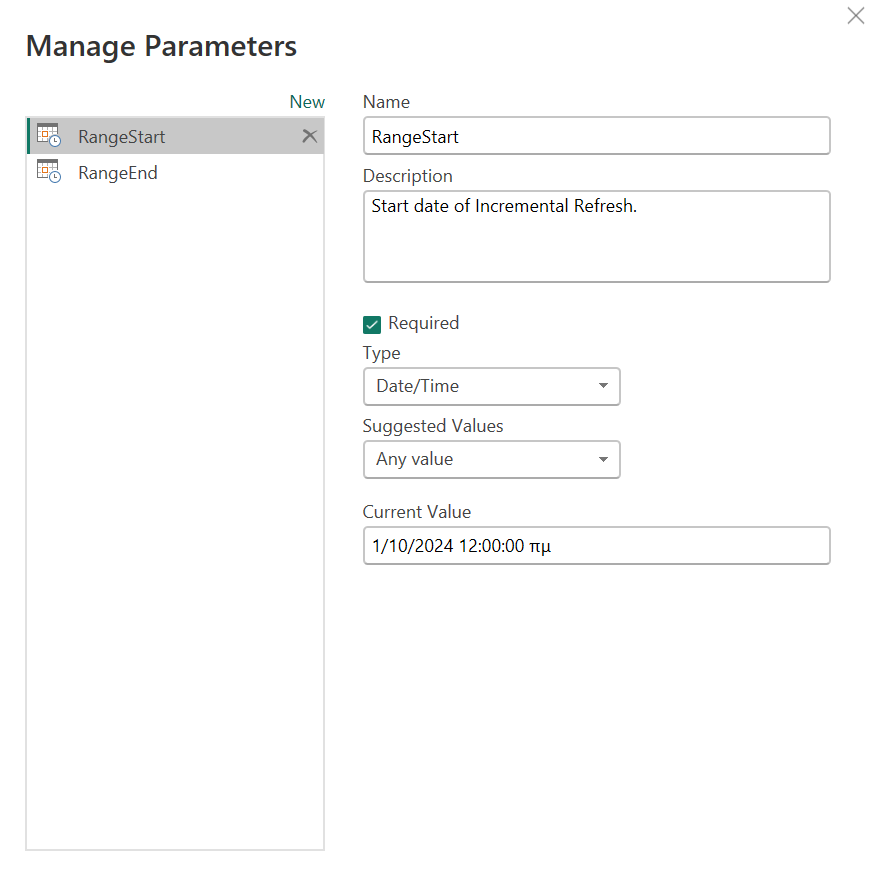
- In the pop-up window, create the following two parameters:
- RangeStart (Start Date for Incremental Refresh)
- Required: Enabled
- Type: Date/Time
- Suggested Values: Any value
- Current Value: Set a specific date
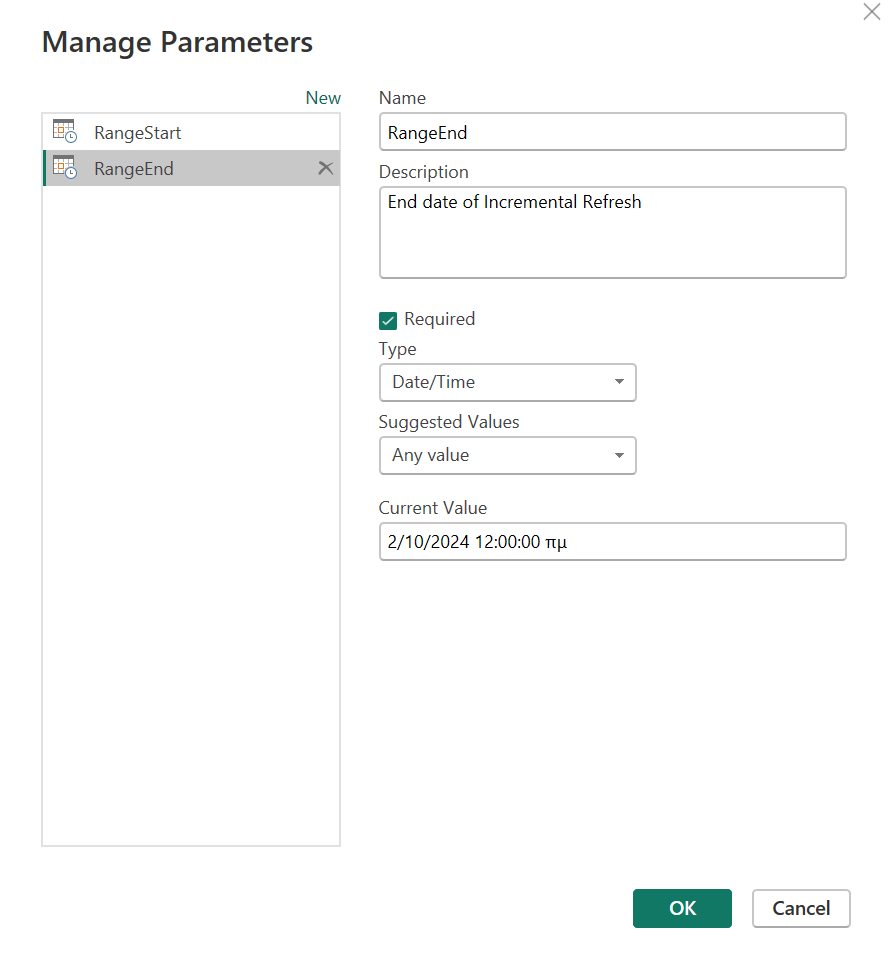
- RangeEnd (End Date for Incremental Refresh)
- Follow the same steps as for RangeStart.
- Click OK.
- RangeStart (Start Date for Incremental Refresh)
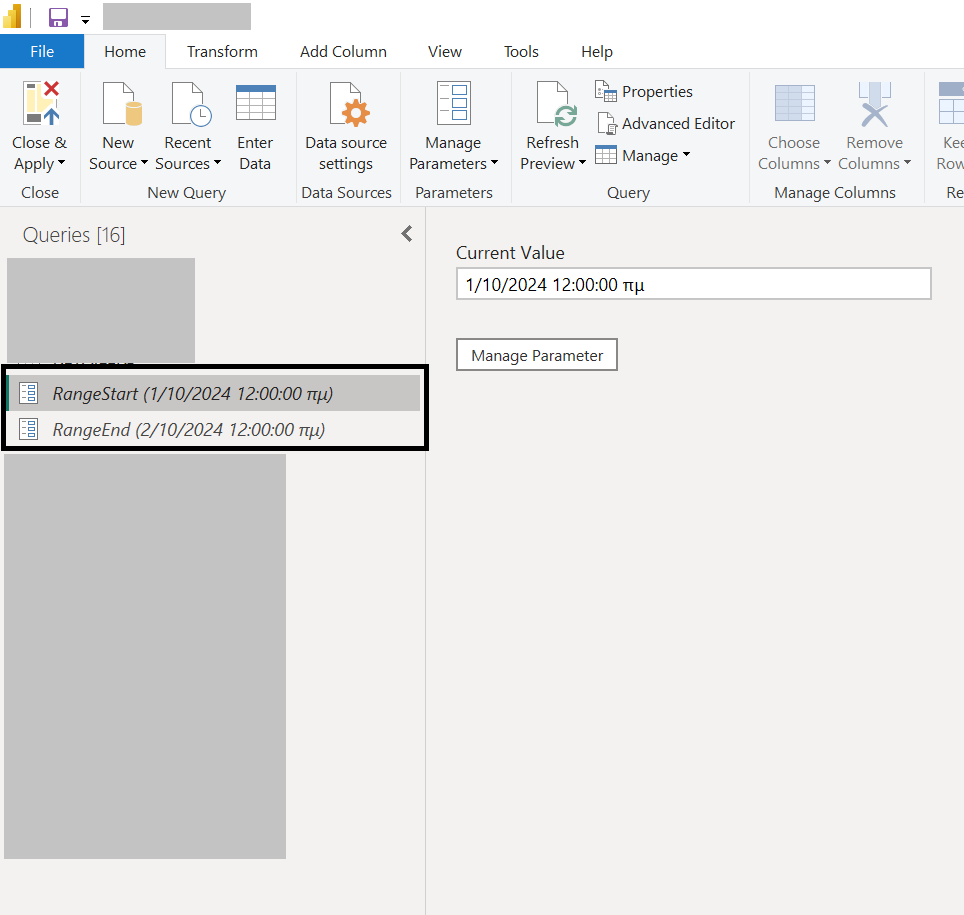
- The two newly created parameters will now appear in the Queries pane of the Power Query Editor.
- Update the SQL query to include the parameters for filtering the data:
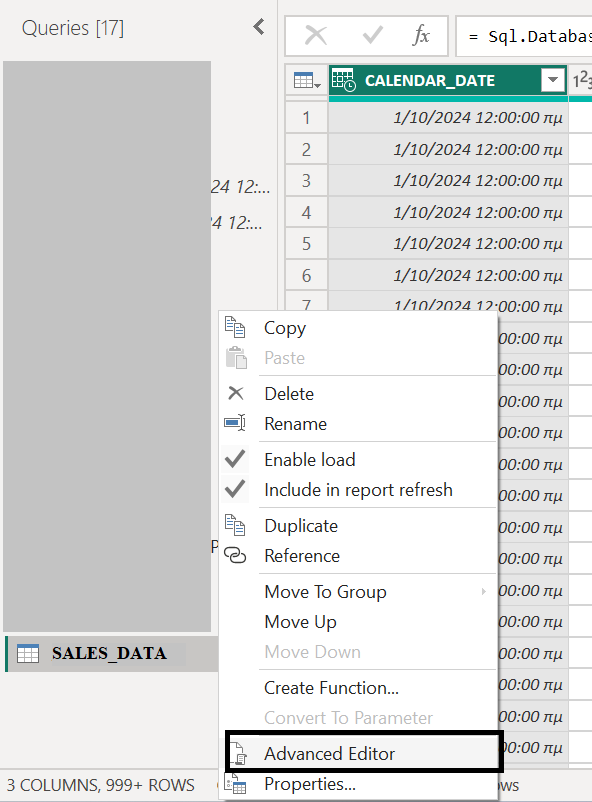
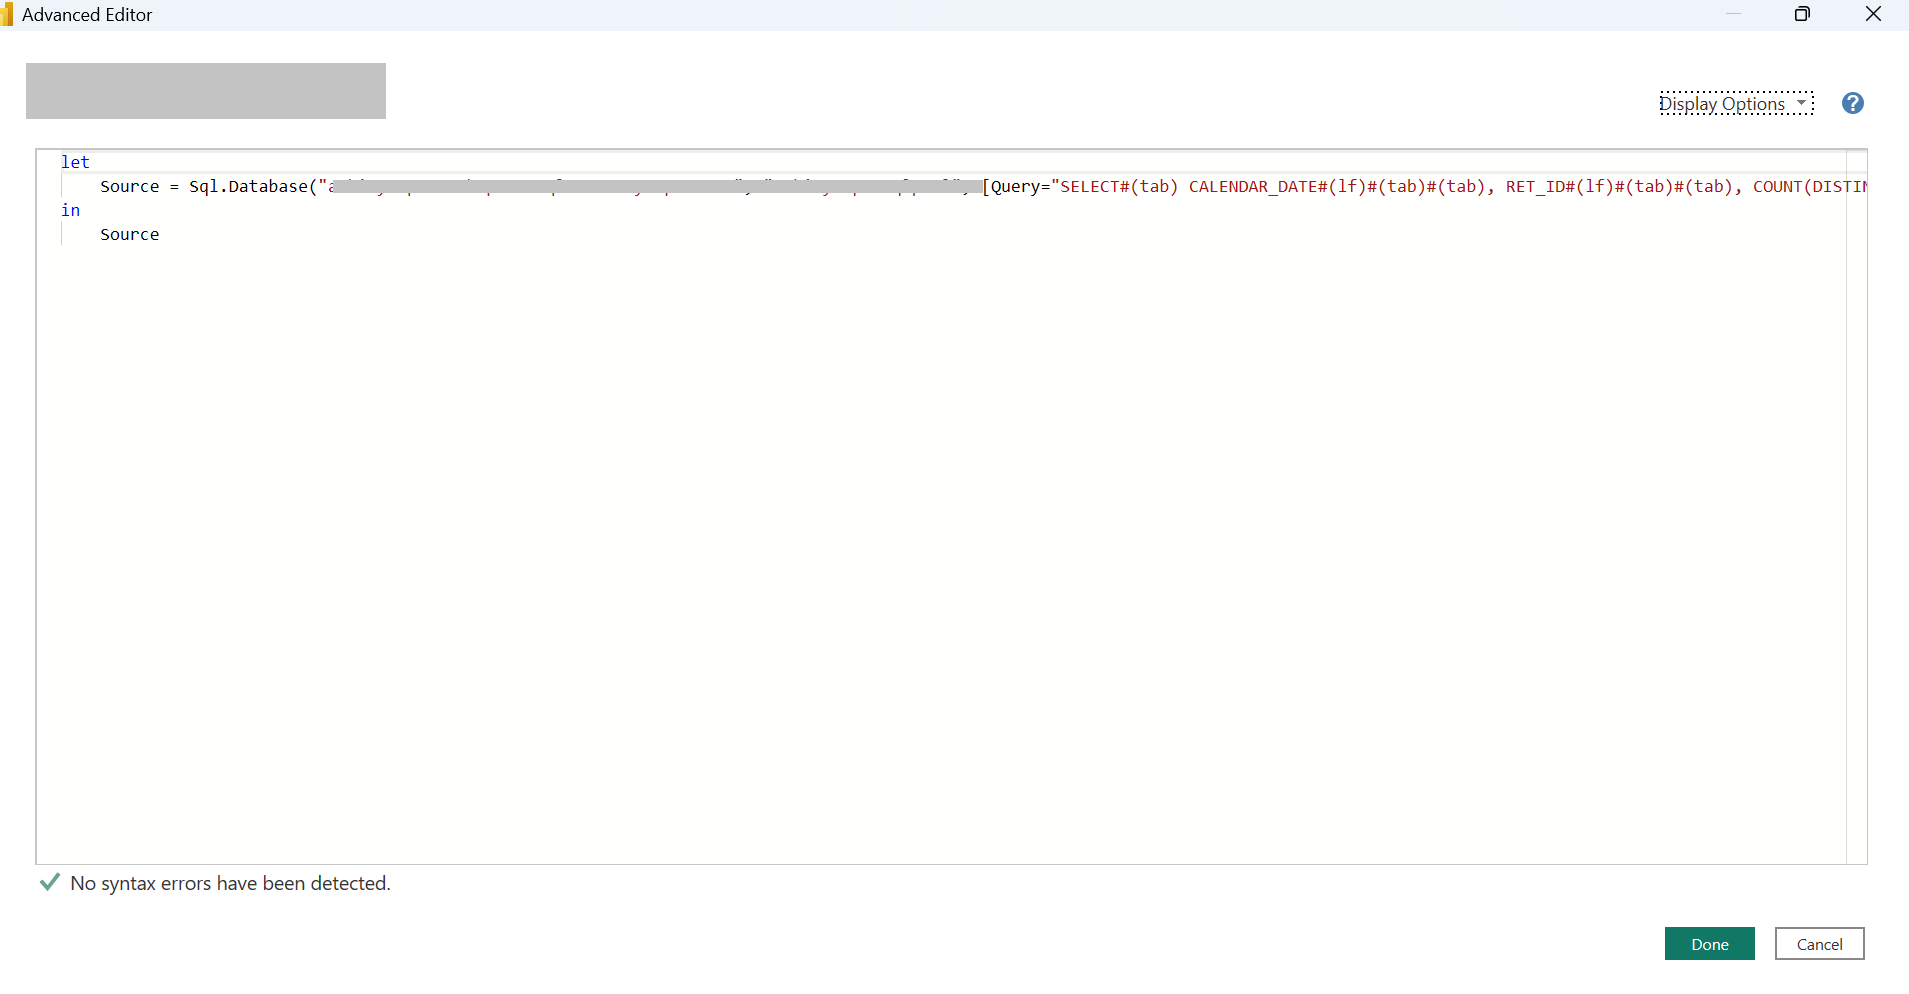
- Select the SALES_DATA table, right-click, and choose Advanced Editor.
- In the M query editor, modify the SQL query by adding M query functions, two times.
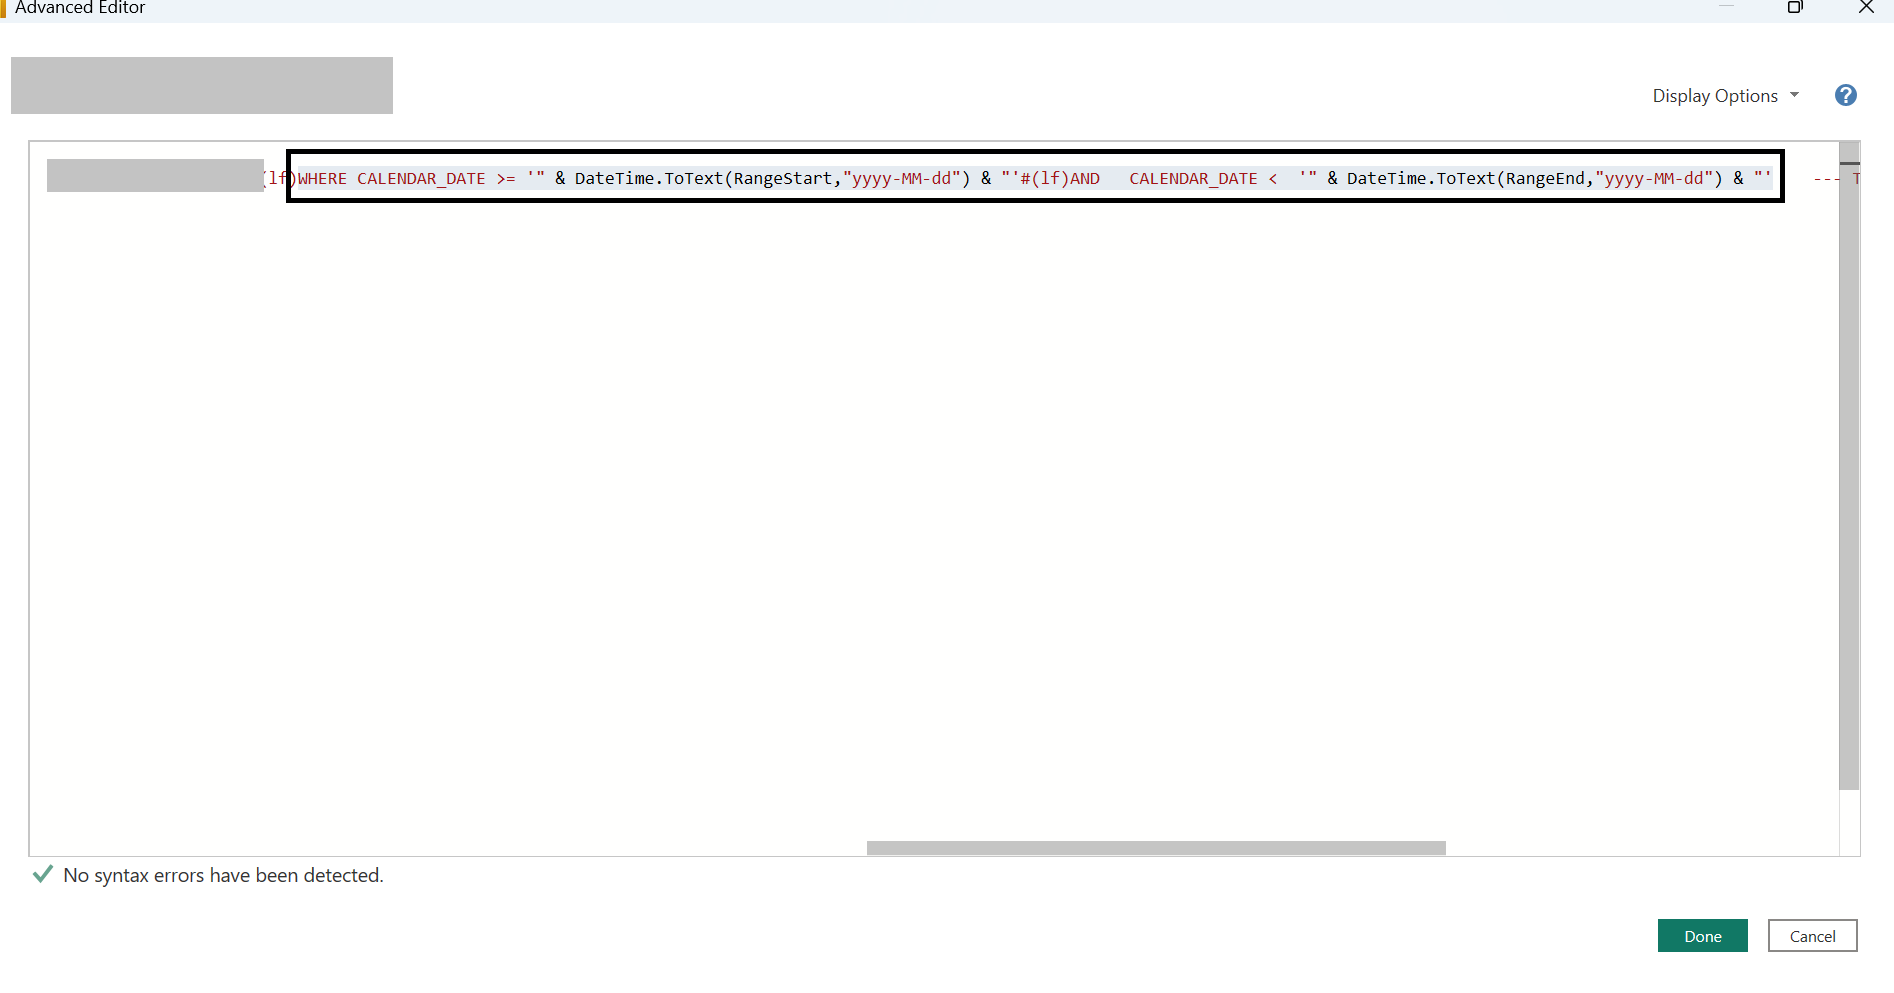
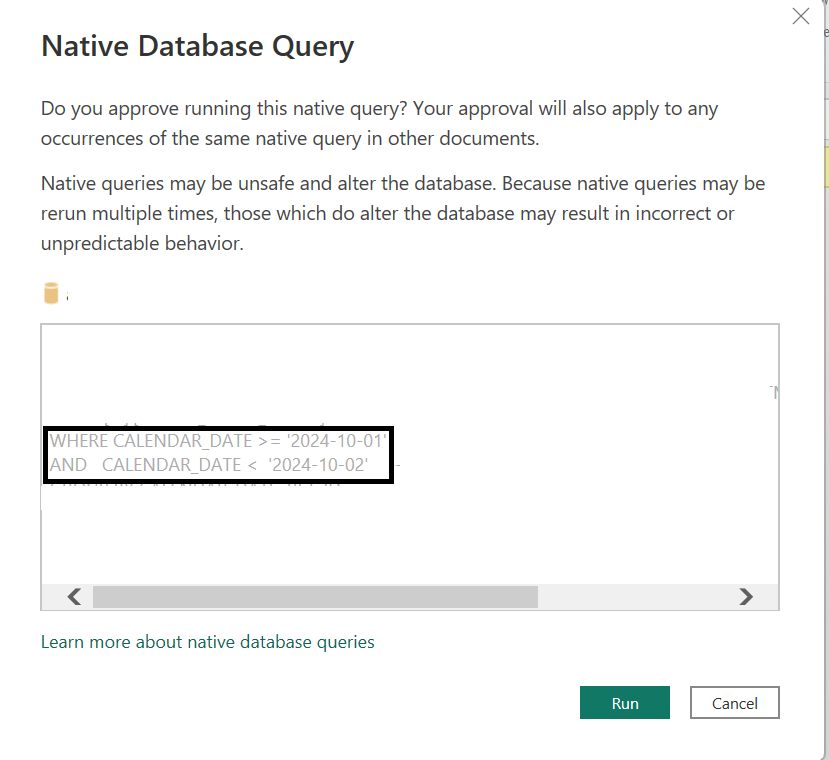
- Go to the WHERE clause in the SQL query (where the date filters are).
- Modify the expression by adding the following lines:
- This line of code replace the value of the date on >= side: & DateTime.ToText(RangeStart, “yyyy-MM-dd”) &
- This line of code replace the value of the date on < side: & DateTime.ToText(RangeEnd, “yyyy-MM-dd”) &
- A warning message may appear in the Power Query Editor for the modified table. Click Edit Permissions.
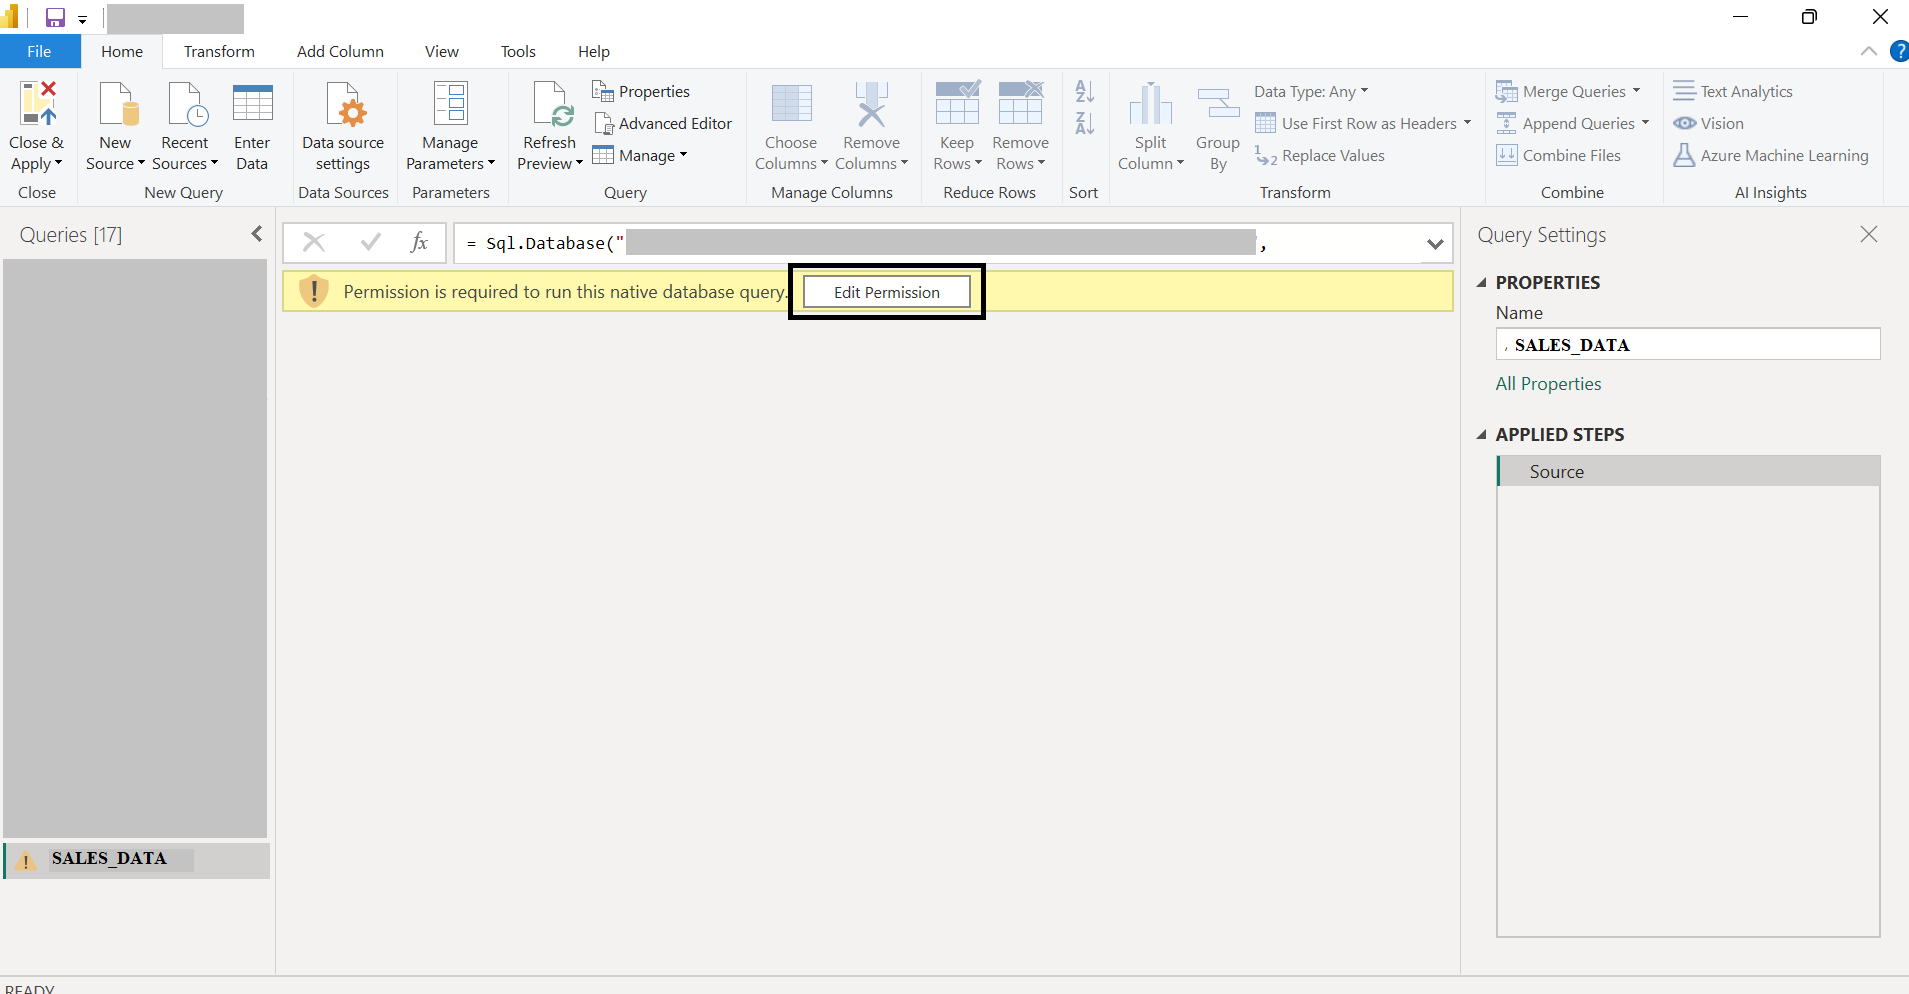
- A pop-up window will display the transformed query with the parameter values applied. Click Run to load the filtered data.
- Once done, click Close & Apply from the Home menu to apply the changes.
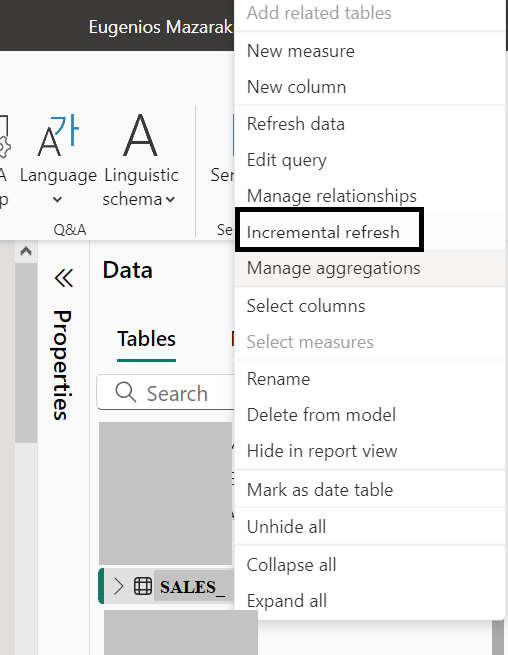
- Now, you are out of the power query editor. It’s time to set-up the incremental refresh policy for the SALES_DATA table.
- Select the SALES_DATA table from the Data pane, go to More options (…) > Incremental Refresh.
- In the pop-up window, do the followings:
- First, select the desired table.
- Enable the option Set import and refresh ranges.
- Define the historical period for partitioning and refresh:
- Archive data starting [X months] before refresh date (e.g., 3 months).
- Incrementally refresh data starting [X months] before refresh date (e.g., 1 month, to define the last level of partition).
- Click Apply.
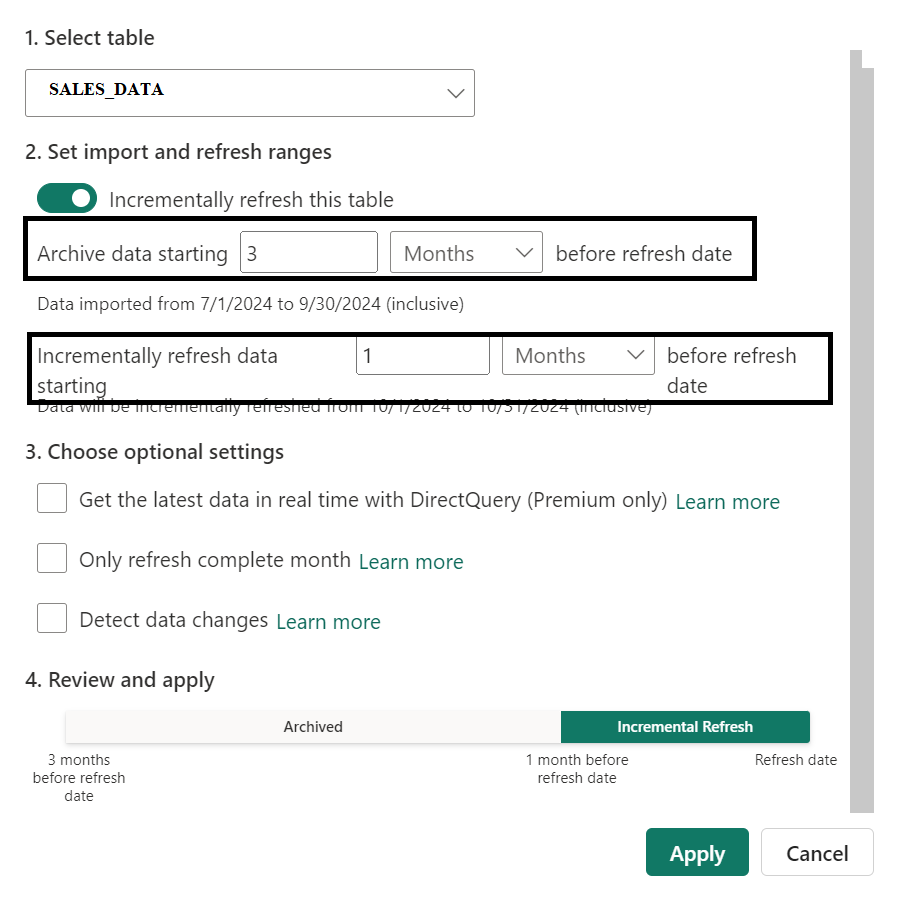
- The incremental refresh policy is now defined but not yet applied.
- Publish the model to Power BI Service:
- Go to Home > Publish, and select the desired workspace.
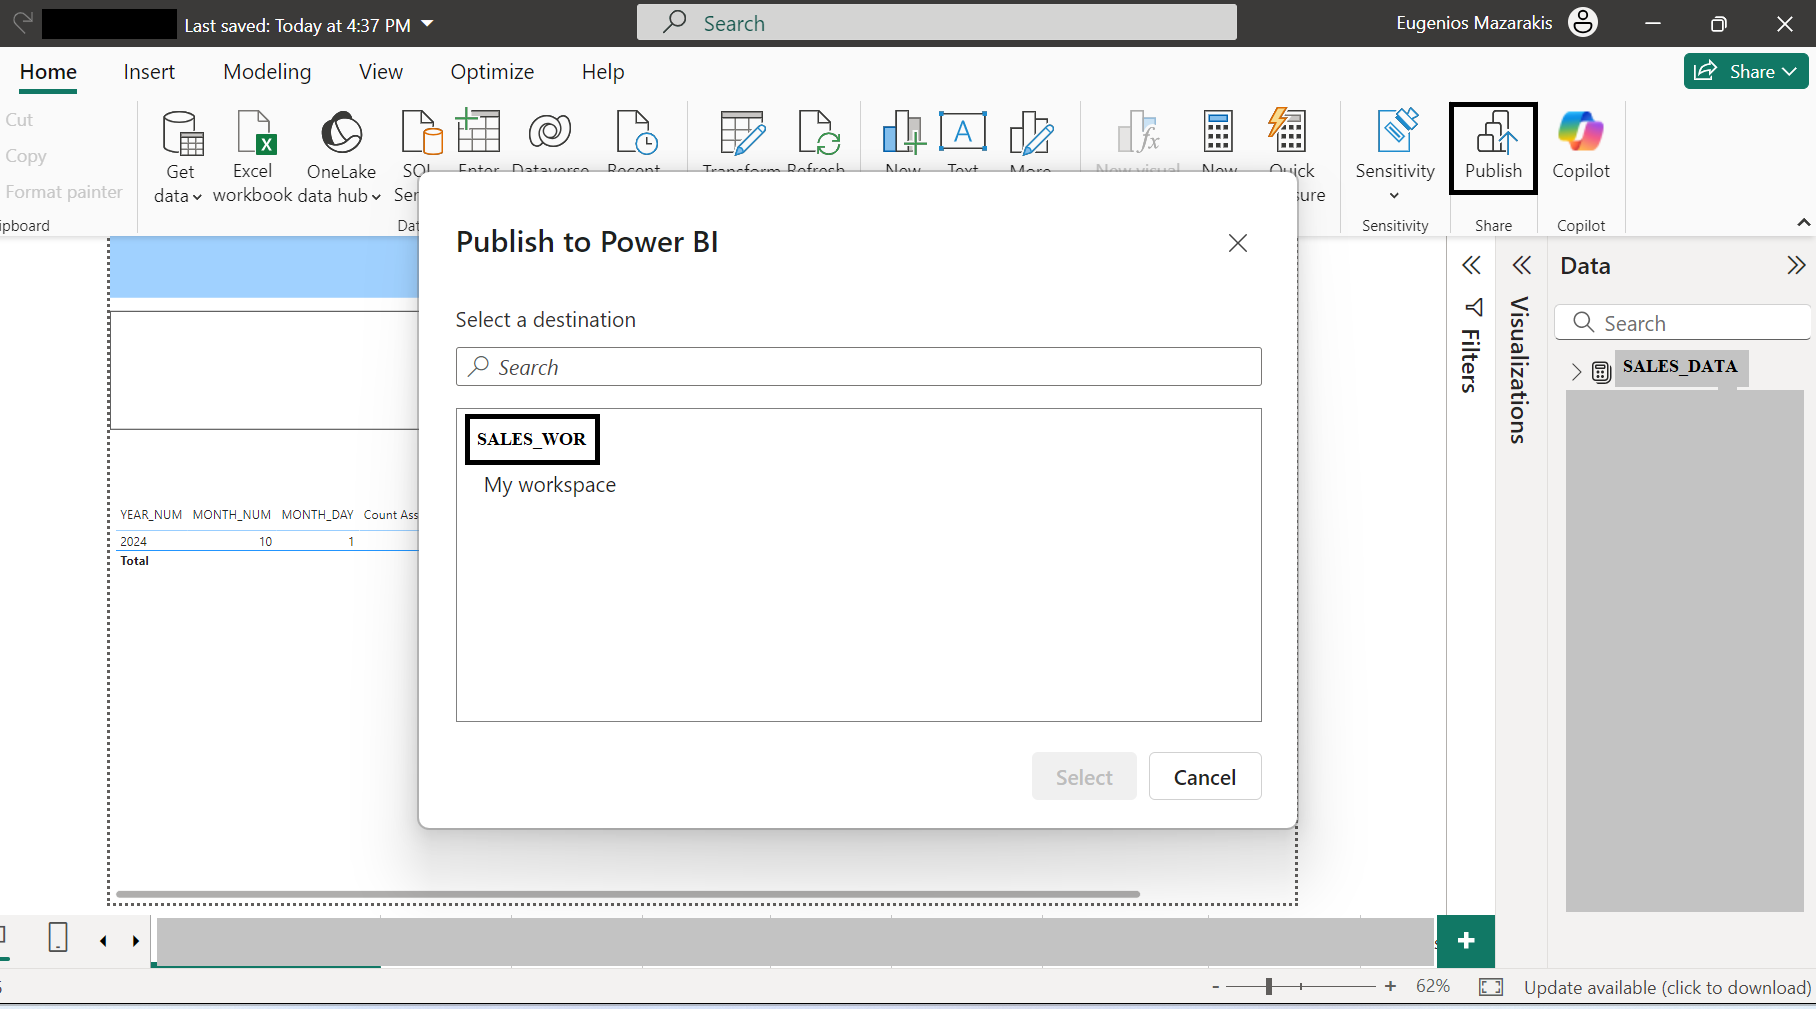
- After publishing, you will see two items in the Power BI Service workspace:
- The Semantic Model.
- The Report.
- Set up the connection between Power BI Service and the Synapse source (handled by the service admin/owner):
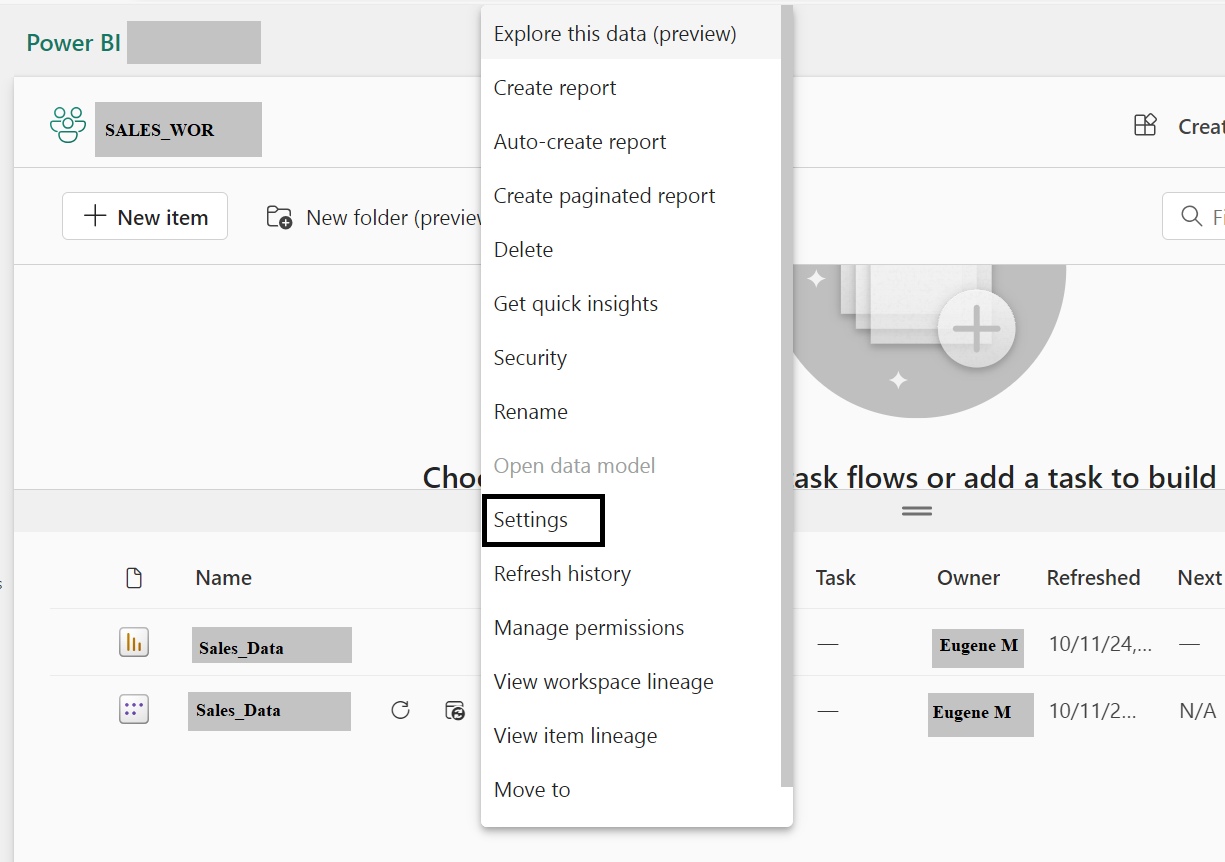
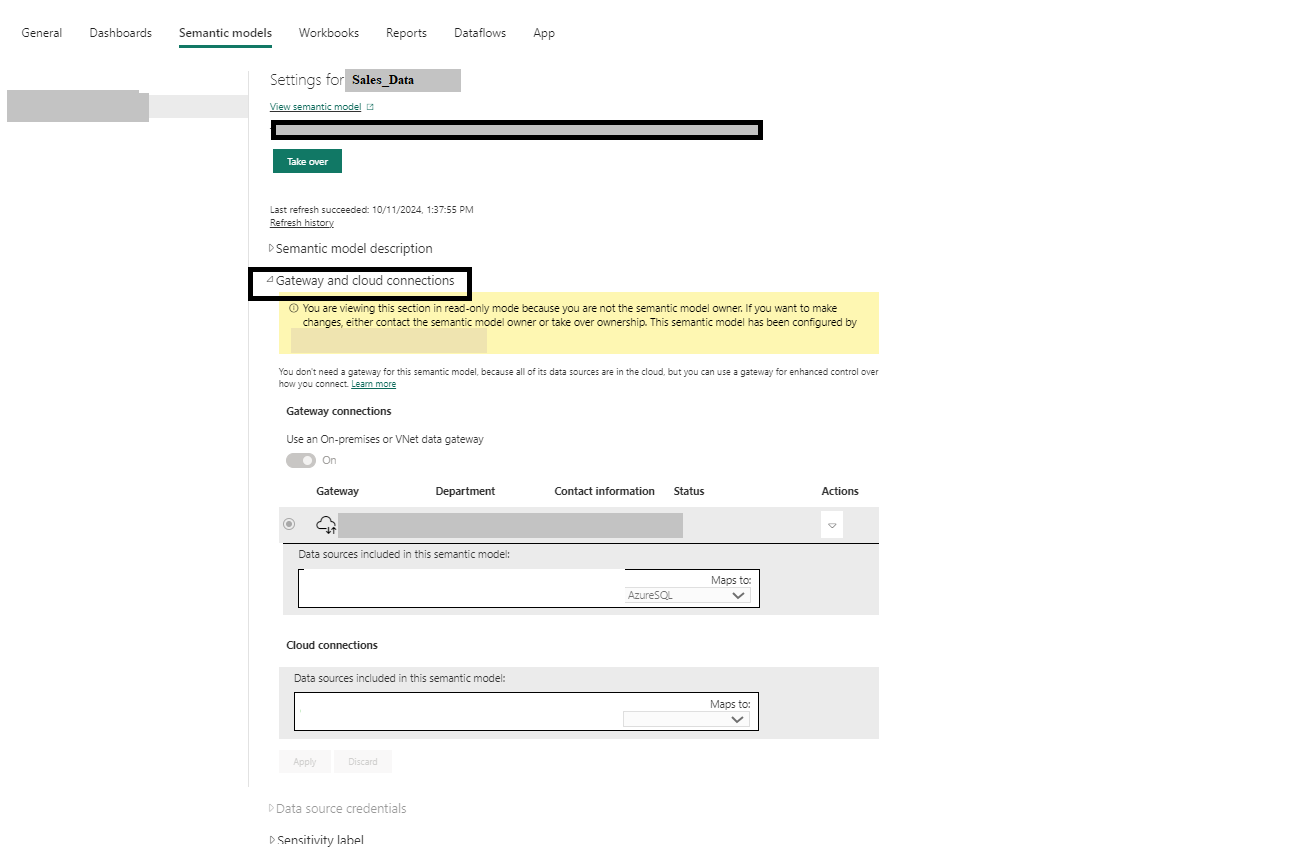
- Go to the semantic model in Power BI Service, select More options (…) > Settings.
- Under Gateway and Cloud options, ensure the connection settings are correct.
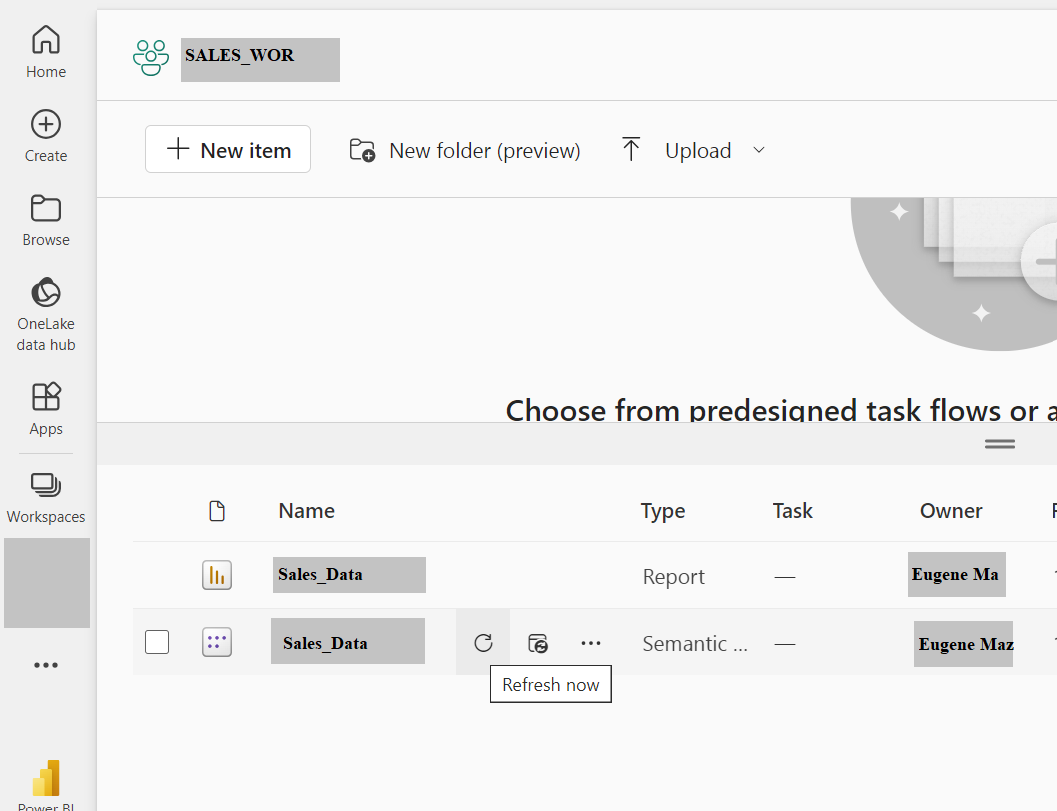
- Perform an on-demand refresh:
- In the Power BI Service workspace, select the model and click Refresh Now.
- During this step, the incremental refresh policy will be applied, loading data and creating partitions. This may take a while.
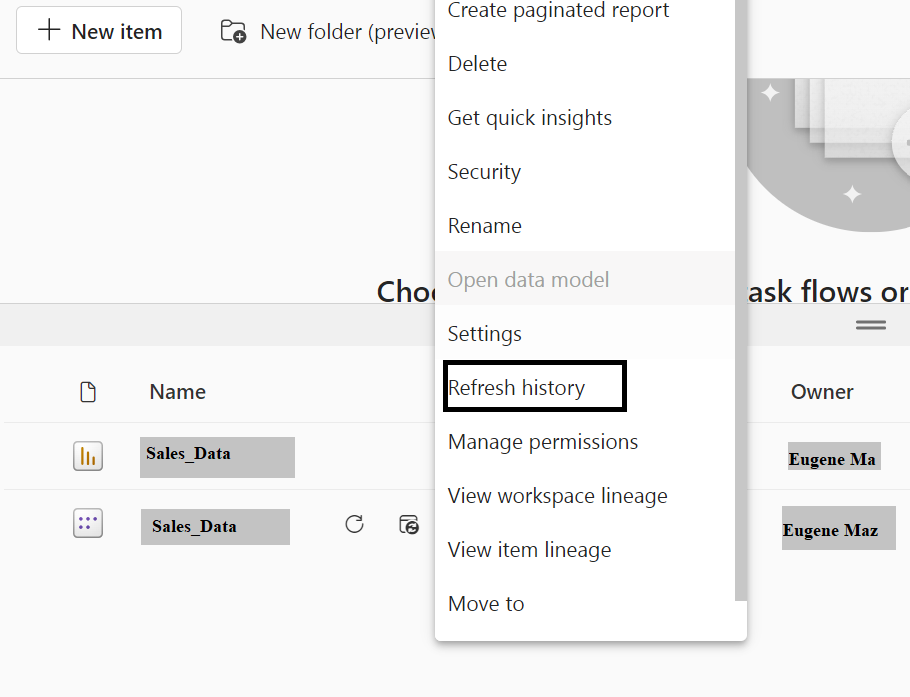
- To see the refresh duration:
- Go to the semantic model, click More options (…) > Refresh History. See References 6

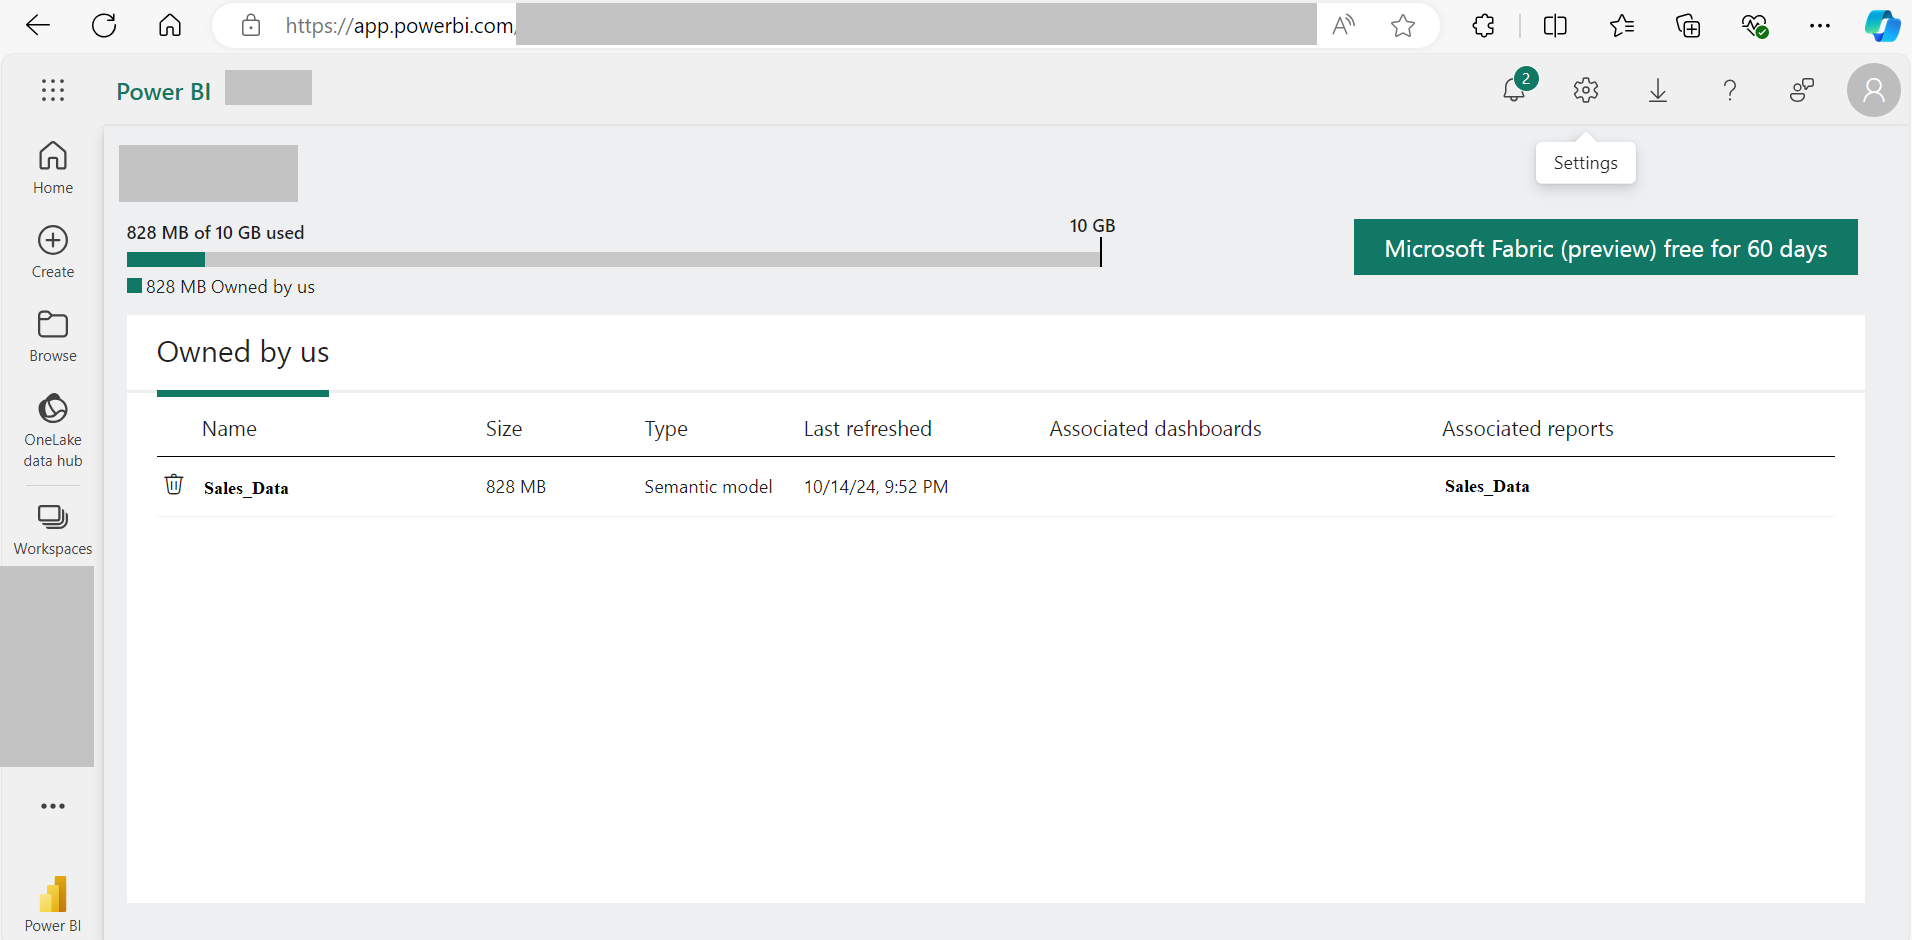
- Now, in order to see the size of the semantic model after the full loading (first on-demand refresh), you can go to gear icon in the top right corner in the power bi service.
- Select Manage group storage. See References 7
Shared Capacity Limitations
- A shared capacity workspace has a semantic model/report size limit of 1 GB.
- We cannot connect to a Power BI shared workspace using SSMS or Tabular Editor to manipulate the tables’ partitions. See References 8,9,10,11
References
- Incremental Refresh Overview
- Define Incremental Refresh Policy on table
- Create Parameters
- Reference Parameters in the M query
- Partitions
- Refresh History of the semantic model
- Size of the Semantic Model on PBI Service
- Get the workspace connection URL
- Connect to workspace by using SSMS
- Refresh Partition with SSMS
- Tabular Editor Apply Incremental Refresh Policy